User guide · v1.0.0
Getting the most out of Flexa Cache
A step-by-step walkthrough of every admin screen - no code required. Follow it in order the first time, then dip back in whenever you need a refresher.
Step 1
Getting started
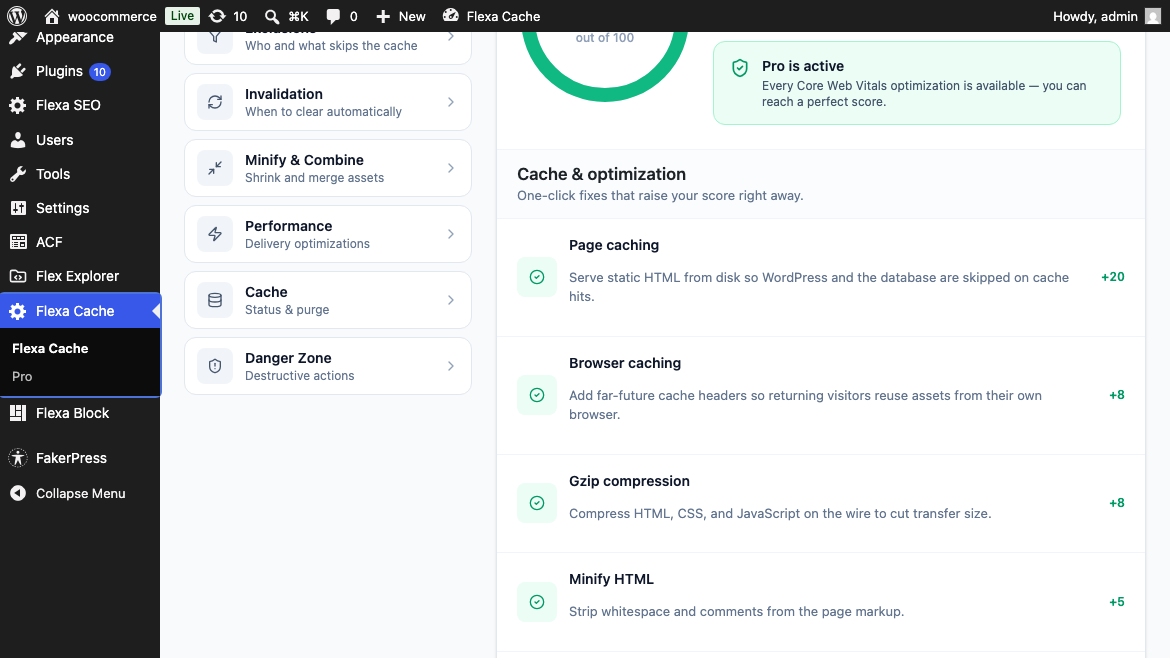
Once the plugin is activated you'll find a new Flexa Cache item in the WordPress admin menu on the left. Everything in this guide lives under that menu.
- In the WordPress admin sidebar, click Flexa Cache. It sits in the middle group of the menu, near the other optimization tools.
- The plugin opens on the General tab. The five tabs along the left - General, Optimize, Assets, Exclusions and Cache - are the five sections covered in this guide.
Who can see this?
Only administrators (users who can manage options) can open the Flexa Cache screens. Editors and shop managers will not see the menu.
Overview
Admin dashboard
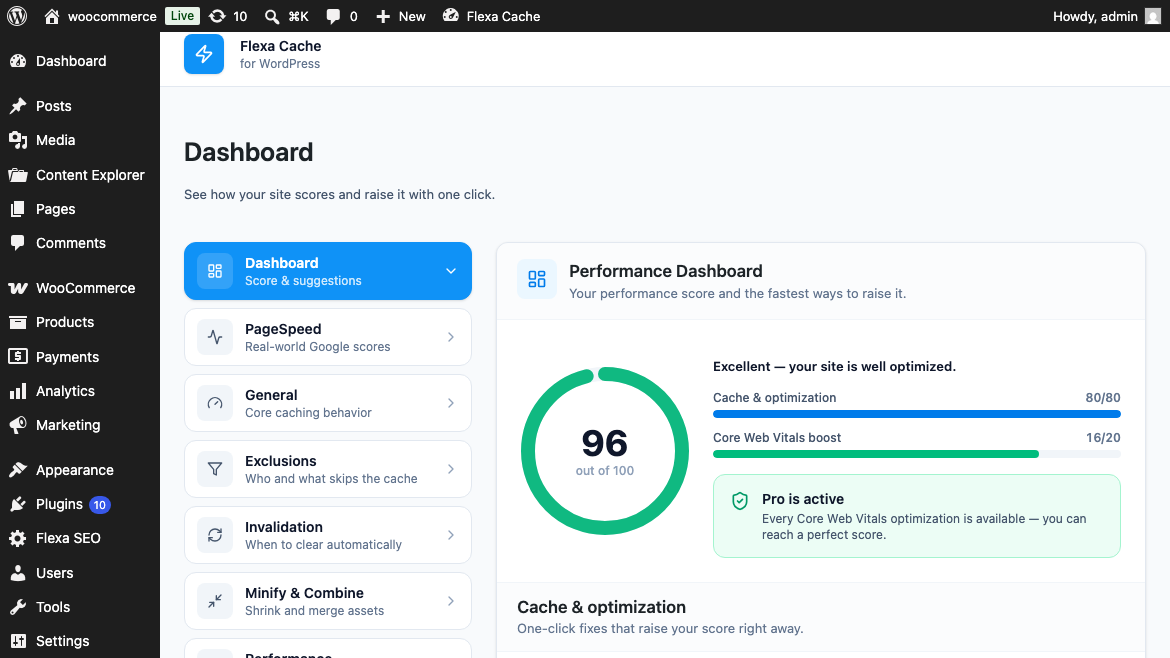
The Dashboard tab (first item in the left nav when you open Flexa Cache) gives you an at-a-glance performance score and the tools to act on it — all without leaving WordPress.
Performance score
The score runs from 0 to 100. Each optimisation toggle contributes points when it is on. The free plugin accounts for up to 80 points across 13 checks (page caching, browser caching, gzip, minify HTML/CSS/JS, combine assets, lazy-load, delay JS, render-blocking, emoji, Google Fonts, preloader). The remaining 20 points come from Pro's Core-Web-Vitals features — they show as locked opportunities on the free plugin.
Each check that is off shows a Fix it button that turns on the relevant setting in one click and re-runs the score without a page reload.
PageSpeed Vitals (Pro only)
When Flexa Cache Pro is active a second tab — PageSpeed — appears. It pulls real-world Google PageSpeed Insights scores for your homepage (mobile and desktop) and displays them alongside 30-point trend sparklines for Performance, LCP, INP and CLS.
Below the scores the Recommendations panel maps each failing Google audit to the exact plugin toggle that fixes it. Actionable items (toggle currently off) show an Enable button; informational items (no plugin fix yet, e.g. WebP conversion) are listed for context only.
The test URL is filterable
By default Flexa Cache Pro tests your homepage (home_url('/')). To test a staging URL or a different page, add a flexa_cache/pro/vitals_url filter in functions.php:
add_filter('flexa_cache/pro/vitals_url', fn() => 'https://yoursite.com/shop/');
Step 2
Enable caching
The single most important toggle. Without it the plugin is installed but does nothing - no cache files are written and the drop-in serves WordPress normally.
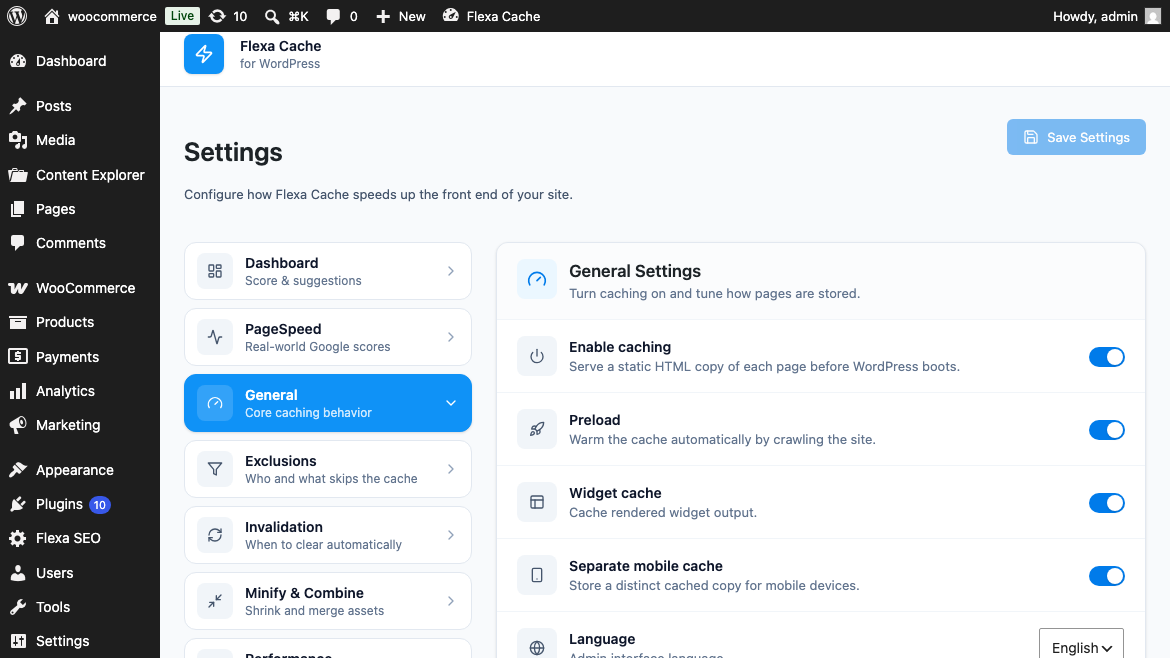
- Open the General tab. You'll see Enable caching at the very top.
- Flip the toggle on. The plugin immediately installs the
advanced-cache.phpdrop-in and starts writing static HTML files for every cacheable request. - Click Save settings. You'll see a green confirmation toast.
The drop-in serves pages before WordPress loads
Flexa Cache writes static HTML to wp-content/cache/flexa/. The advanced-cache.php drop-in intercepts the request before WordPress boots and serves that file directly - giving you the fastest possible TTFB without touching PHP or the database.
Re-activation refreshes the drop-in
If you update the plugin the drop-in is refreshed automatically on next (de)activation. If you are upgrading from a very old version, deactivate and re-activate the plugin once to pick up any drop-in changes.
Step 3
General settings
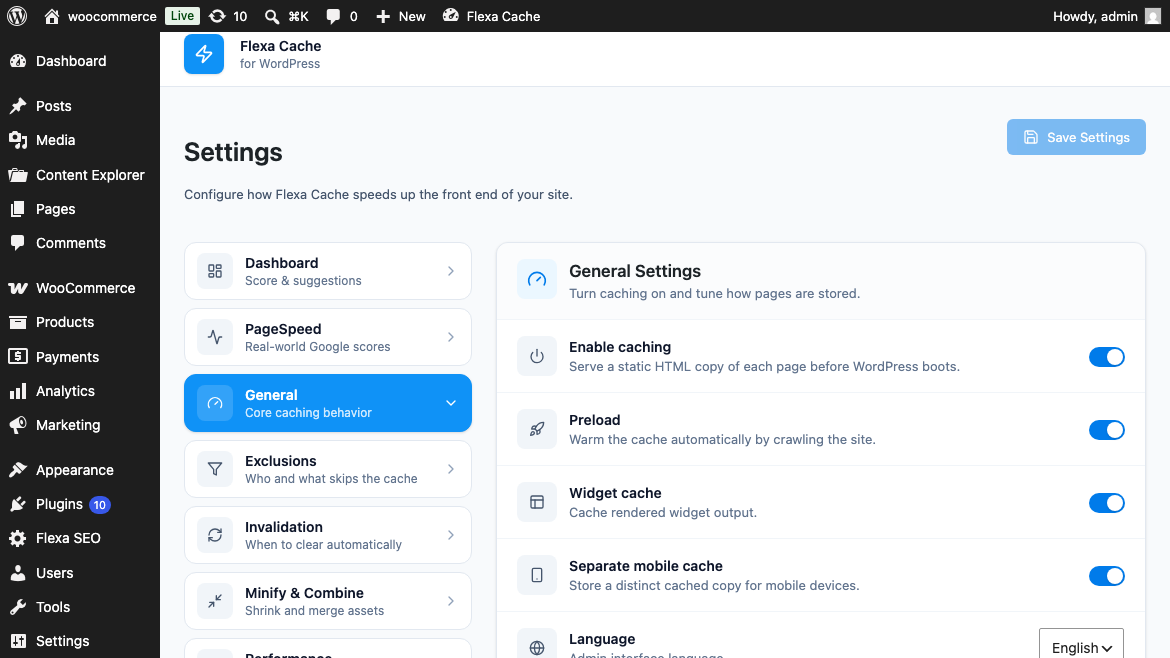
The General tab controls who gets cached and when the cache is automatically cleared.
| Toggle | What it does |
|---|---|
| Enable caching | Master switch. Off = no caching at all. |
| Exclude logged-in users | Bypass the cache for users who are logged in. Highly recommended — logged-in pages are personalized and should not be shared. |
| Exclude mobile | Serve WordPress normally to mobile visitors instead of the cached HTML. Use this if your theme has separate mobile/desktop logic that caching would break. |
| Clear on new post | Purge the entire cache whenever a new post is published. |
| Clear on update post | Purge the entire cache whenever an existing post is updated. |
| Gzip compression | Write a pre-compressed .html.gz sibling for every cached page, and add a mod_deflate .htaccess block for dynamic responses. |
Exclude logged-in users is on by default
Leaving this off means a logged-in admin's personalized page (with nonces, cart fragments, etc.) could be cached and then served to every anonymous visitor. Keep it on unless you specifically need full-page caching for logged-in sessions.
Step 4
Optimize settings
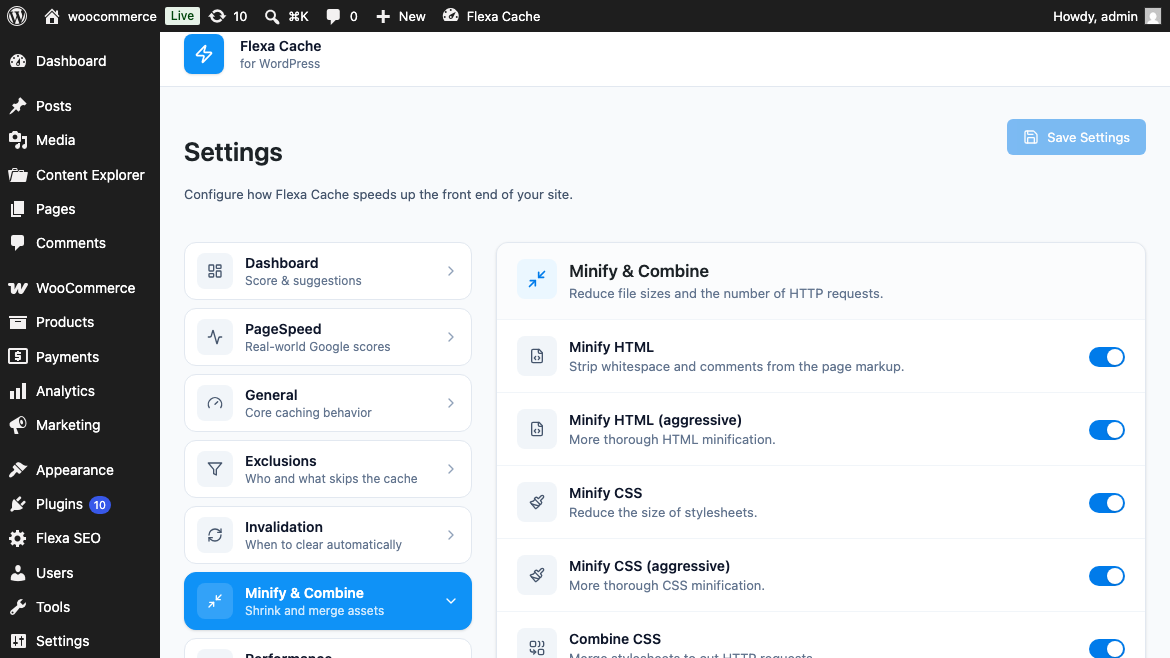
The Optimize tab adds lightweight front-end optimizations on top of the page cache - all safe to enable together.
| Toggle | What it does |
|---|---|
| Minify HTML | Strips unnecessary whitespace from the HTML output before it is cached. |
| Minify HTML Plus | Adds safe inline-CSS minification and whitespace-only inline-JS trimming on top of Minify HTML. |
| Gzip compression | See General settings — this toggle is mirrored here for convenience. |
| Browser caching | Adds Cache-Control and Expires headers via .htaccess so returning visitors reuse static assets without re-downloading them. |
| Disable emojis | Removes the WordPress emoji detection script and related DNS prefetch from the front end. Saves one HTTP request per page. |
| Lazy load images | Adds loading="lazy" and decoding="async" to every <img> tag that does not already have a loading attribute, so below-the-fold images load on demand. |
These run on the cached buffer
Minify HTML, Lazy Load and all the Asset optimizations (next section) run on the HTML buffer before it is written to disk. The cached file is already the optimized version, so every subsequent request gets the full benefit with no per-request cost.
Step 5
Assets & JS settings
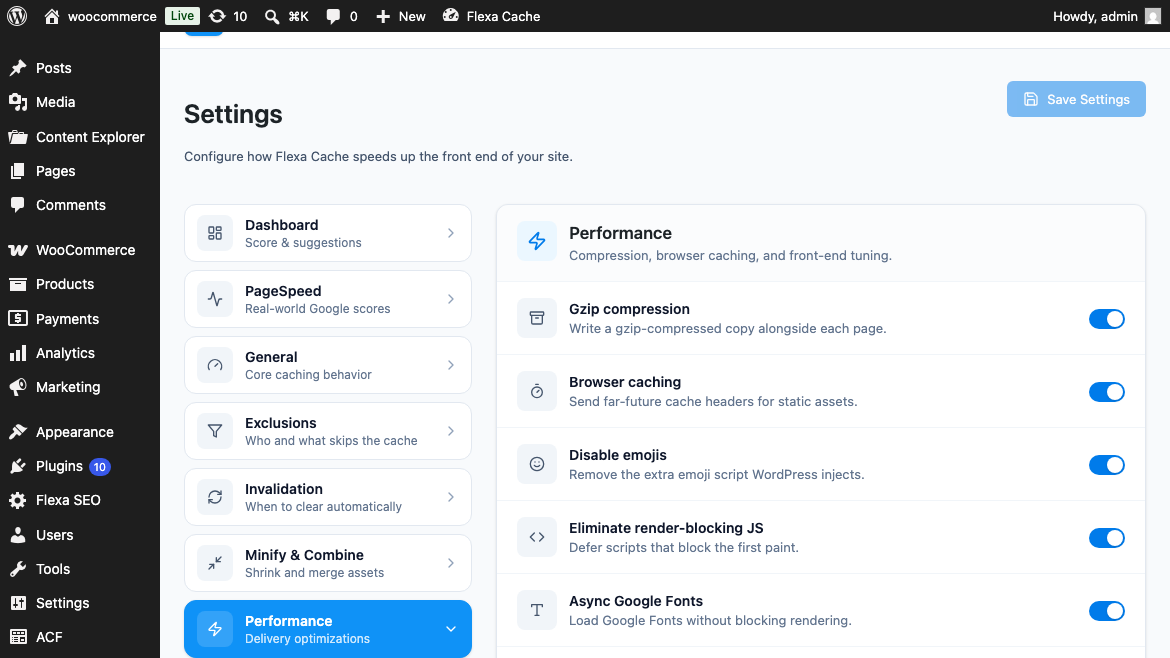
The Assets tab consolidates CSS and JavaScript to reduce the number of HTTP requests. These are more advanced optimizations - enable them one at a time and test your site after each.
| Toggle | What it does |
|---|---|
| Minify CSS | Strips whitespace and comments from stylesheet files before combining them. |
| Minify CSS Plus | Adds punctuation-level CSS minification (extra spaces around selectors, colons, semicolons) on top of Minify CSS. |
| Combine CSS | Merges consecutive same-region stylesheet tags into one bundle. CSS cascade and load order are preserved exactly. |
| Combine JavaScript | Merges consecutive same-region script tags into one bundle. Execution order is byte-exact. Note: inline <script> blocks (wp_localize_script data) are never moved. |
| Combine JavaScript Plus | Mirrors Combine JS but also processes the additional JS output from Combine CSS bundling. |
| Remove render-blocking JS | Adds defer to external script tags so they do not block HTML parsing. jQuery core and the admin bar are always excluded. |
| Google Fonts async | Rewrites <link rel="stylesheet"> Google Fonts requests to load asynchronously with a <noscript> fallback, eliminating a render-blocking round trip. |
| Delay JavaScript | Neutralizes external scripts until the user interacts with the page (or a 7-second idle timeout). Speeds up Largest Contentful Paint. |
Test JavaScript combine carefully
CSS combine is safe for all themes. JavaScript combine is conservative by default - inline data blocks and jQuery are always excluded - but every theme is different. Enable it on a staging site first, test all interactive features (menus, sliders, checkout), then roll out to production.
Combine JS and Delay JS interact
When both Combine JS and Delay JS are on, the combined bundle is injected directly into the buffer and is not delayed. Only separately enqueued external scripts are delayed. This is the correct and safe behavior.
Step 6
Exclusions
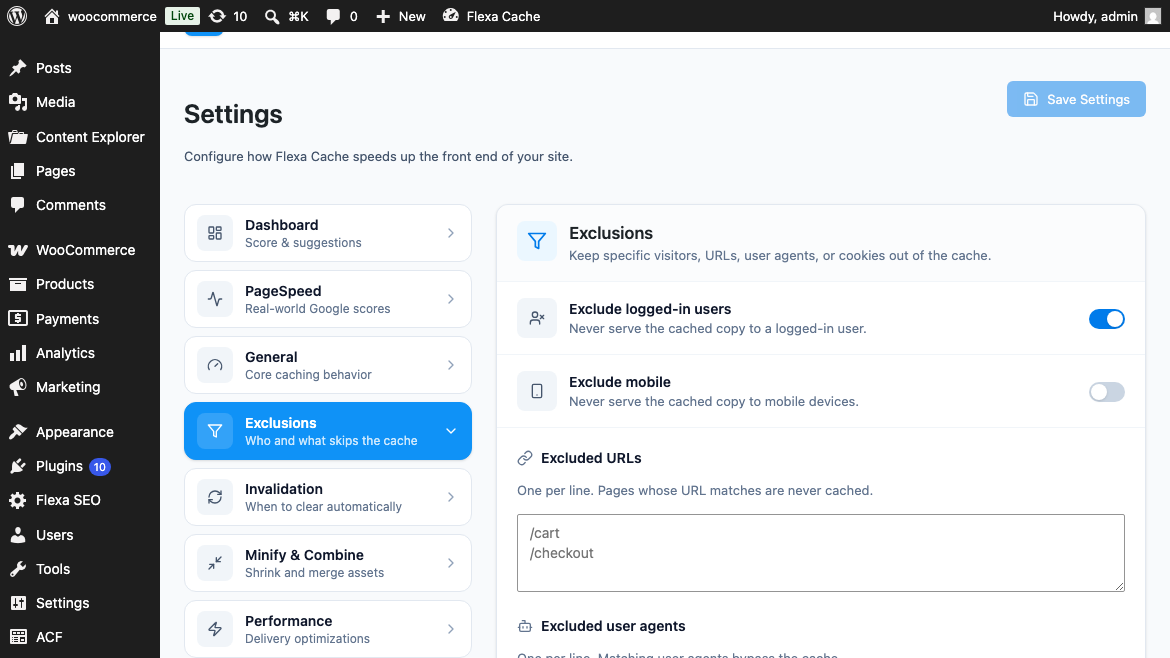
The Exclusions tab lets you tell Flexa Cache to skip certain pages, CSS files or JavaScript files - for cases where caching or combining would break something.
There are three exclusion lists:
- Exclude URLs - pages that should never be cached (e.g.
/cart/,/checkout/,/my-account/). One URL or partial path per line. WooCommerce cart and checkout pages are automatically excluded when WooCommerce is active. - Exclude CSS files - stylesheet handles or partial src paths to skip from CSS combining. Useful for third-party sliders or page builders that break when their CSS is merged.
- Exclude JS files - script handles or partial src paths to skip from JS combining and defer. jQuery core and the admin bar are always excluded automatically.
- Type a URL, handle or partial path into the relevant exclusion field.
- Press Enter or click Add to add it to the list.
- Click the x next to any entry to remove it.
- Click Save settings to apply the changes.
URL matching is prefix-based
A URL exclusion of /account/ will also exclude /account/orders/ and /account/profile/. Enter the shortest prefix that captures all the pages you want to skip.
Step 7
Cache preloader
After a cache clear the site is cold - the first visitor to each page pays the full WordPress boot cost. The Preloader warms the cache in the background so your real visitors always hit a cached page.
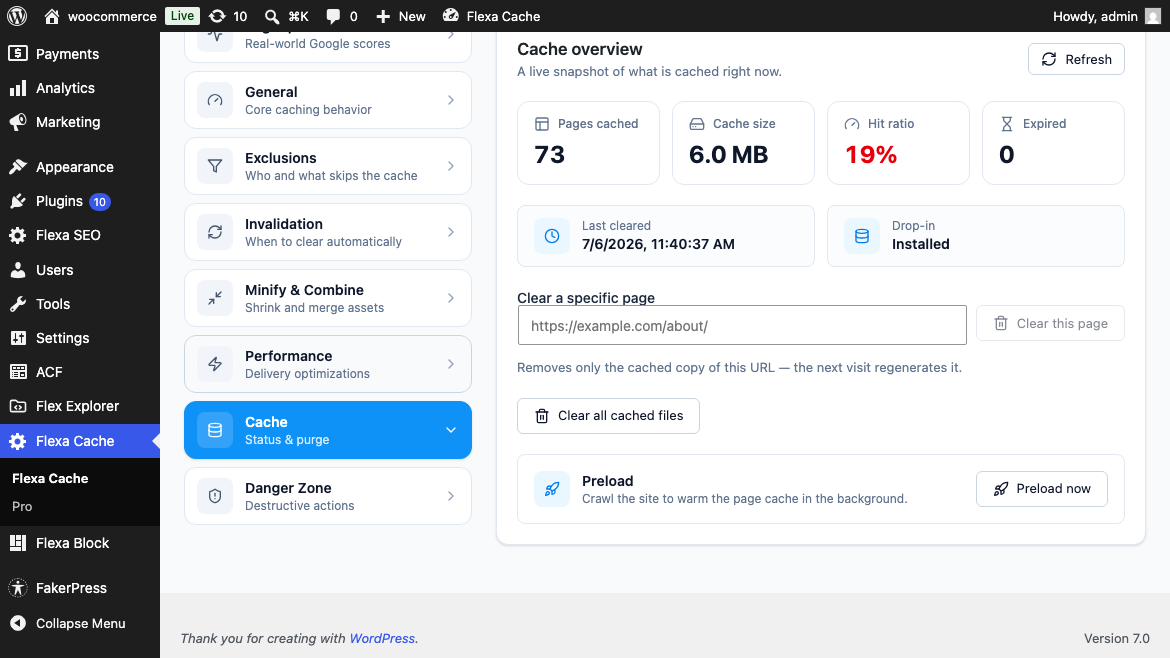
You'll find the preloader controls in the Cache tab under the Preloader heading. You can also enable it globally from the General tab's Preload toggle, which automatically re-warms the cache after any full purge.
- Open the Cache tab and scroll to Preloader.
- Click Start preloading. The progress bar shows how many pages have been crawled.
- The preloader runs in the background (via Action Scheduler when available, or WP-Cron otherwise) so your admin session stays responsive.
- Click Cancel at any time to stop it. Already-warm pages remain cached.
Auto-warm on purge
Enable the Preload toggle on the General tab and the preloader will kick off automatically every time you do a full cache clear - including the clears triggered by new/updated posts.
Step 8
Clearing the cache
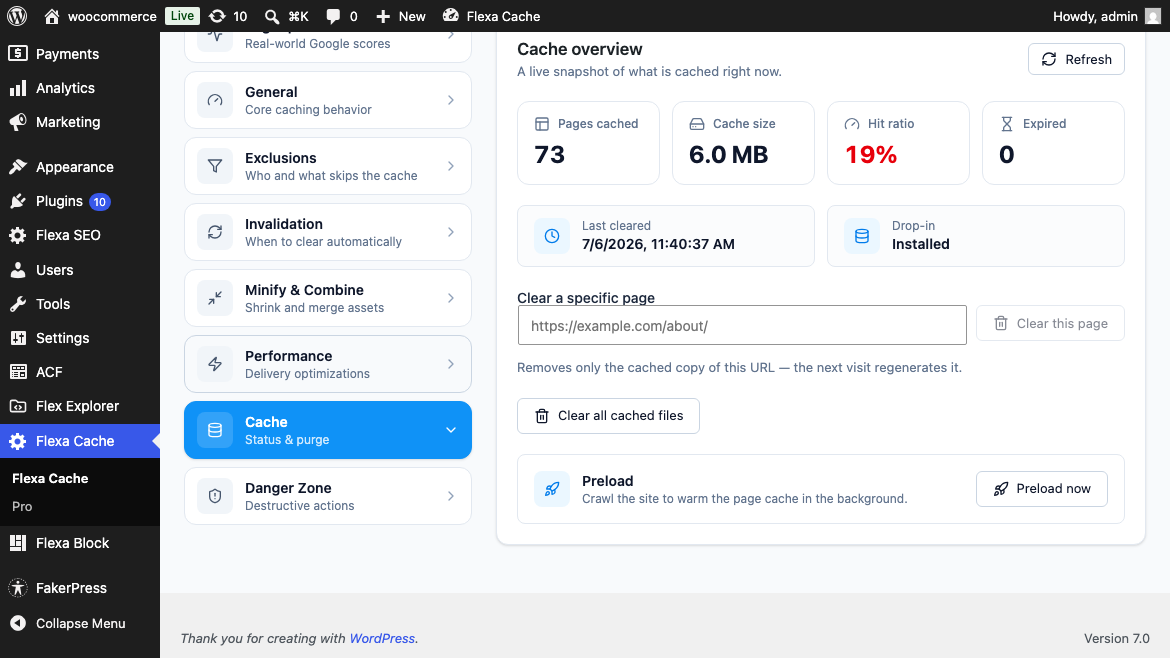
The Cache tab is your manual control panel for purging cache files. You can clear everything at once or target a single URL.
The panel shows three stats at a glance: total cached pages, the size on disk, and when the cache was last cleared.
| Action | What it does |
|---|---|
| Clear all cache | Deletes every cached file under wp-content/cache/flexa/. The next visitor to each page re-generates its cache. |
| Clear this page (URL input) | Deletes only the cached file for the URL you enter. Useful when you update a single page and want to refresh just that one file. |
- To clear everything: click the red Clear all cache button. A toast confirms success.
- To clear one page: type the URL in the input field and click Clear this page, or press Enter. The field clears automatically on success.
Cache also clears automatically
You do not need to clear the cache manually after every change. If you have the Clear on new post and Clear on update post toggles on (General tab), publishing or editing a post automatically purges the cache. WooCommerce cart and order events are also handled automatically.
Help
Troubleshooting & FAQ
My pages are not being cached.
Check five things: (1) Enable caching is on in General; (2) the request is not from a logged-in user with Exclude logged-in users on; (3) the URL is not in the Exclusions list; (4) there is no active cookie that signals a session (WooCommerce cart cookies always bypass the cache); (5) the page does not set a Cache-Control: no-cache header.
The site looks broken or JavaScript stopped working after enabling Assets.
Disable Combine JS first. If that fixes it, a specific script is incompatible with combining. Go to Exclusions, add that script's handle or partial filename to Exclude JS files, then re-enable Combine JS.
CSS is missing after enabling Combine CSS.
A stylesheet with an @import rule cannot be safely combined (the @import must stay at the top). Flexa Cache automatically excludes those files from combining. If you see missing styles, add the stylesheet handle to Exclude CSS files.
I updated a post but the cached page still shows the old content.
Make sure Clear on update post is enabled on the General tab. If it is on and the page is still stale, try a manual "Clear this page" from the Cache tab, or clear the whole cache.
The preloader seems to be stuck / not completing.
The preloader runs over Action Scheduler or WP-Cron - it depends on background task processing. If WP-Cron is disabled on your server (e.g. DISABLE_WP_CRON is true with no external cron set up), the preloader will queue jobs but never process them. Set up a real cron job that hits wp-cron.php every minute.
Where are the cached files stored?
All cache files are written to wp-content/cache/flexa/, organized by host and URL path. Each page is stored as index.html (and a sibling index.html.gz when Gzip is on). Mobile visitors who trigger the mobile-theme cache get a separate index-mobile.html.
Need the full technical reference (REST API, hooks, WP-CLI)? See the technical documentation.